It is no secret that I love to make and create! So it was only natural to apply this passion to our wedding. Creating our own DIY wedding was a great experience and certainly challenging. There are a heap of advantages to having a DIY wedding
1. Budget - For those of us who do not want to spend our life's saving on a wedding, a DIY wedding can be super cost efficient. We saved a heap of money!
2. Unique - It gives you the opportunity to have a unique wedding with a heap of personality.
3. Pride and Experience - It was a great experience and I am proud to have pulled it off!
So, in the coming month I will be sharing my experiences and tips!
Today I am starting with collecting inspiration and deciding on themes
The following list/reminders helped with the decision making process throughout the DIY wedding planning and reduced headaches
- How much are you going to DIY -
I would have loved to DIY everything, but that was unrealistic for me. (e.g. I wanted to make our cake but it just was not possible, so I had it made in a local bakery, but I made the stand (stay tuned to see our cake!))
- Season -
Consider the time of the year when planning. Winter, Spring, Summer, Autumn. e.g. you don't want a long sleeved wedding dress in the summer.
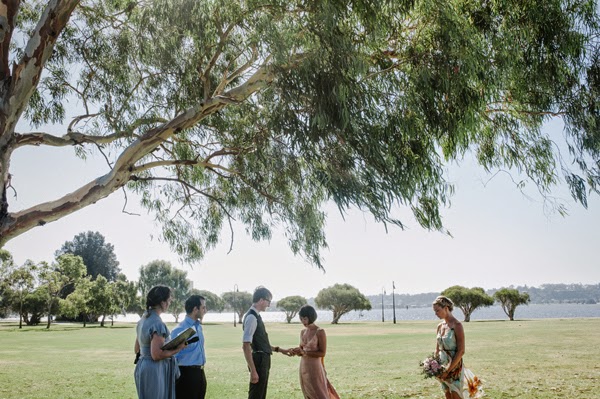
(We had our ceremony under this tree in the Australian summer)
- Colour scheme -
Choose a colour (red, pink, green, yellow etc) or a colour theme (e.g. pastels, bright colours, metallic)
(We had pastels with peppermint green and apricot as the main colours)
- Formality -
Formal, semi formal, informal/casual
(Our wedding was casual, which suited the backyard theme)
- Venue type -
Garden, Backyard, Beach, Hall, Barn, Restaurant, Country, city, tent
(We had a garden, backyard wedding)
- Add your own personality/quirks -
Put some effort into injecting your personality into the wedding
e.g. Music, hobbys,interests
(We took our cameras with us for the photos, I sewed our clothes, had cotton spool name tags, crocheted our cake toppers,created our playlist etc.)
- Inspired by an era -
Period, Deco, Nouveau, 50's, 60's, 70's, 80's, 90's, modern
(The Art Deco period inspired my dress, jewellery & make up)
- Verbs -
Choose some relevant descriptive terms:
eclectic, quirky, fancy, elegant, rustic, classic, romantic, party, rock, punk, natural, ecological, ethical, vintage, indie, local, organic
(I chose these verbs Eclectic/romantic/ethical/local/vintage/party)
- The dreaded budget -
Every decision needs to be made with the budget in mind!
(Ours was low!)
- Be practical -
Think practically, try not to get carried away. The reality is that you can not achieve every fantastic thought/inspiration. You have learn to edit and have a relaxed attitude! What ever happens, happens.
-Be organised -
Create a timeline (find some basic one's on the internet), create excel spreadsheets to help you organise, assign roles/jobs for the big day
- Avoid internet saturation and be confident -
If you are struggling to make decisions, step away from pinterest and wedding blogs. Be confident and trust you decisions
- Think about your journey -
Think about your journey together as a couple and the current stage in your life. How can you incorporate this into you wedding.
(We had a photo wall which reflected our journey and the people in our lives. The music was also a reflection of our journey together)
- Mood board and keep on track -
Use all of this information to create a mood board and keep checking back at your theme ideas. It is easy to get carried away. Make a decision and stick with it. Or have a solid reason to change!
Posts still to come...
- How to set up your garden/backyard wedding
- Making your wedding dress
- Making the grooms suit
- Crocheting the cake toppers
- Making the bridesmaid dress
- Creating your invites
- Choosing your flowers
- Choosing your jewellery
-Choosing a phtographer


